XigmaNAS (Nas4Free) – Recommended Setup
How to setup a XigmaNAS (Nas4Free) the RMTT way
XigmaNAS (formerly Nas4Free) is a great free solution for a NAS box, trouble is that without proper configuration it will not properly work with Active Directory consistently and can have issues with inheritance of permissions. These are the steps we take at RMTT to get them stable in an Active Directory environment. If you have any feedback, shoot me an email at bhamilton@rmtt.com.
Installing on hardware
- Prep hardware:
- Firmware updates (Lifecycle Controller)
- Build hardware RAID Array (hardware RAID still faster than software RAID of XigmaNAS)
- Download installer ISO from xigmanas.com
- Install to USB flash drive vs. a HDD (pretty much all defaults)
Initial Setup
- System > General Setup
- Change password
- Setup Time Zone
- Change Hostname and domain
- Enter DNS Server (Active Directory server as primary)
- Network > LAN Management
- Assign Static IP
Configure ZFS
- Disks > Management > HDD Management
- Import Disks (Apply Changes)
- Disks > Management > HDD Format
- Verify ‘ZFS Storage Pool’ from drop down
- Check disk (most likely the hardware RAID array you already created), Next, Next, Format
- Disks > ZFS > Pools > Virtual Device > +
- Enter Name, Select Disk(s), Click Stripe (Apply Changes)
- Disks > ZFS > Pools > Management > +
- Enter Pool Name, Select Virtual Device, Add (Apply Changes)
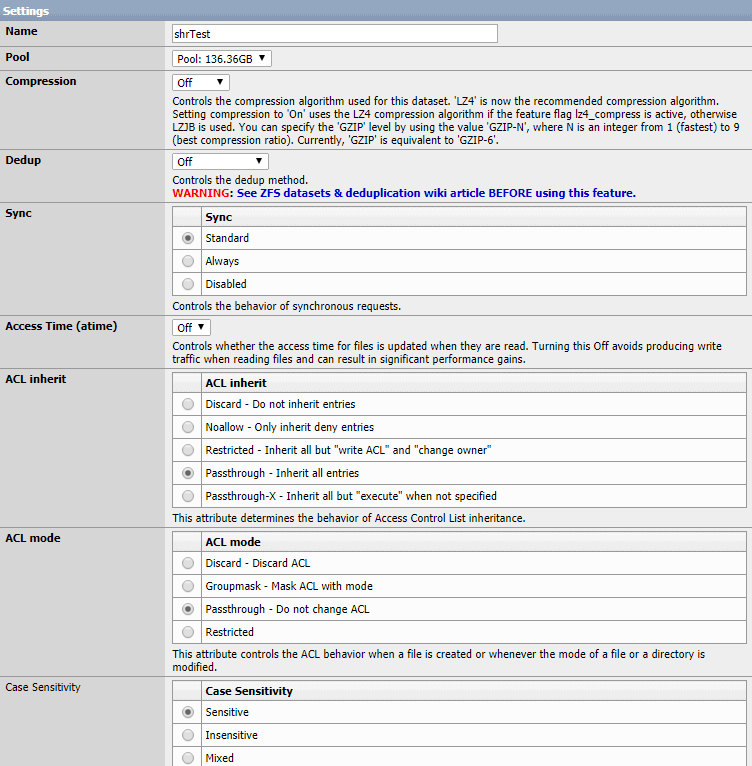
- Disks > ZFS > Datasets > Dataset > +
- ACL Inherit: Passthrough – Inherit all entries
- ACL Mode: Passthrough – Do not change ACL
Configure Active Directory and SMB/CIFS
Active Directory Integration
- Access > Active Directory
- Check Enable
- For Domain Controller Name, use FQDN (ie, server01.domain.lan)
- Fill in relevant information
- Diagnostics > Information > MS Active Directory
- Verify that all tests pass and you see a list of domain users
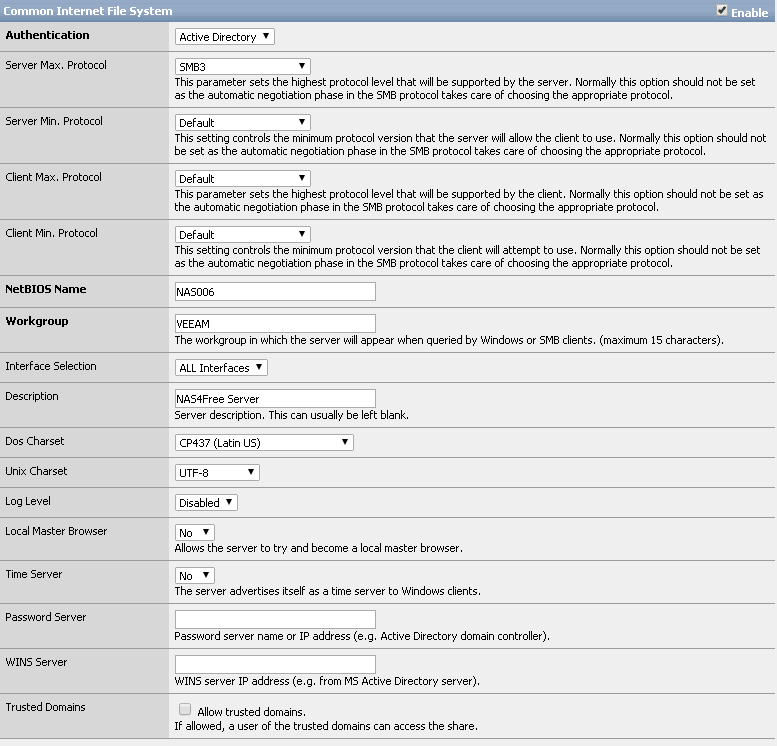
Enable CIFS/SMB
- Services > CIFS/SMB > Settings
- Check enable
- Fill in relevant information
- Enter No on Master Browers
- Enter No on Time Server
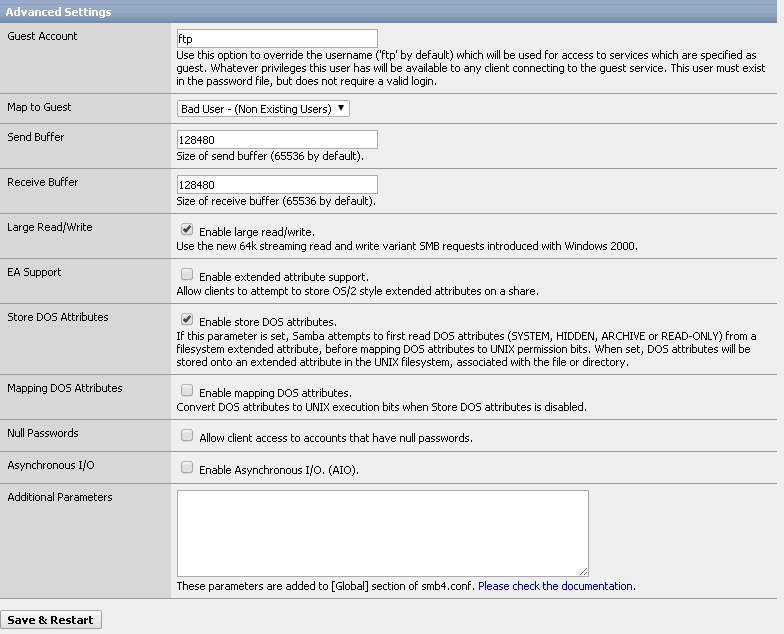
- Under Advanced Settings, check “Enable store DOS attributes”
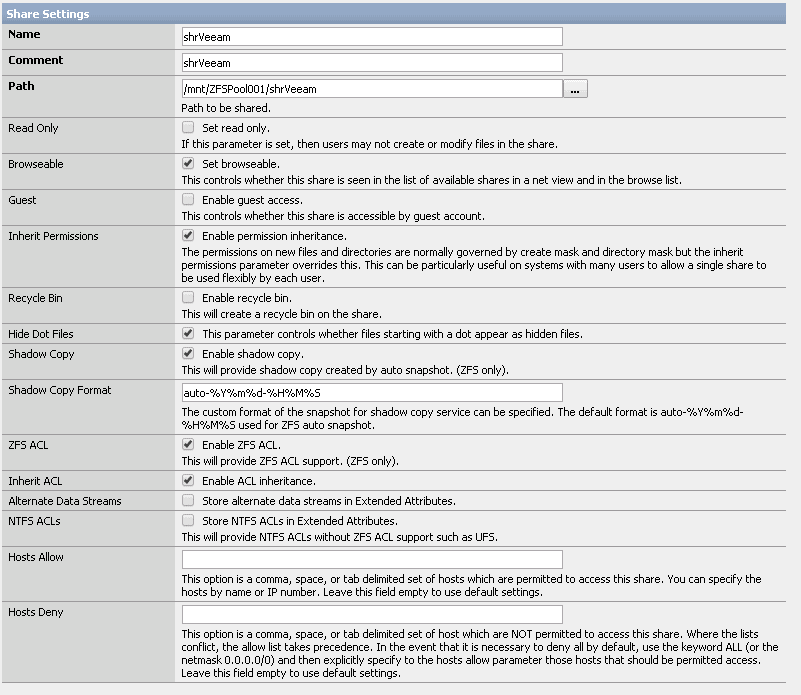
- Services > CIFS/SMB > Share > Edit
- Uncheck Enable Guest
- Enable ZFS ACL
- Optionally disable recycle bin
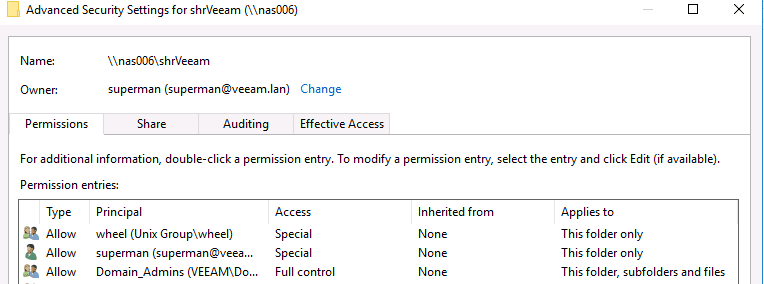
Take Ownership of folder
- From a computer on the domain, Take ownership as a domain user (likely your administrator account) and check ‘Replace all child object permission…’
- Give Domain\Domain Admins full control
Setup Alerts
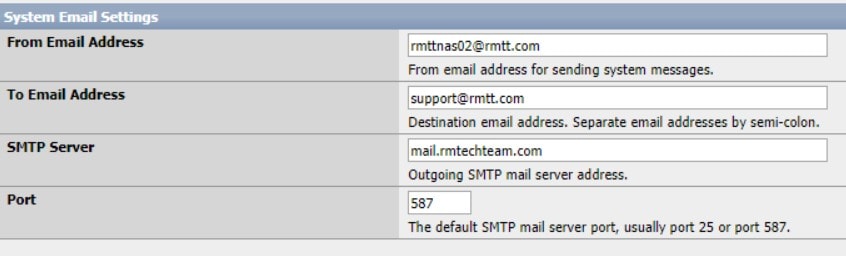
- System > Advanced > Email Setup
- Disks > Management > S.M.A.R.T.