DUO – Setting up Multi-Factor Authentication for OpenVPN on pfSense
This tutorial requires that you have RADIUS configured for authentication between your pfSense and AD/LDAP server and that OpenVPN services have already been configured. If you have not already done so, please start with this article and follow Setup using Active Directory method.
- Install Duo Authentication Proxy on a device that is NOT your AD/LDAP server
- Login to your Duo Admin Panel
- Select proper customer
- Select Applications
- Select Protect an Application
- Search for RADIUS and choose Protect this Application, then name it as you please and make necessary policy changes
- Choose Simple under username normalization (found under Settings)

- On Windows edit your config file located here: C:\Program Files (x86)\Duo Security Authentication Proxy\conf\authproxy.cfg
- Under [ad-client], fill out the following:
- host=[IP OF AD/LDAP SERVER]
- service_account_username=[username of domain admin or service account that can bind to your directory and perform searches]
- service_account_password=[password for account defined in previous step (7,1,2)]
- search_dn=DC=[DOMAIN NAME],DC=[PREFIX] (example: DC=YOURDOMAIN,DC=local)
- Under [radius_server_auto]
- ikey= [insert Integration key found in Step 6]
- skey=[insert Secret key found in Step 6]
- api_host=[insert API hostname found in Step 6]
- radius_ip_1=[insert IP of pfSense]
- radius_secret_1=[insert current (or new) RADIUS secret that is used between your existing pfSense and NPS server]
- Save File *If you have more than one AD server, you can enter host_2 and so on to configure additional resources
- Under [ad-client], fill out the following:
- Run net start DuoAuthProxy from PowerShell
- If you make any changes to your log file moving forward, you will need to stop/start service using net stop DuoAuthProxy & net start DuoAuthProxy
- Login to pfSense
- Go to System > User Manager > Authentication Servers and Edit your existing Authentication Server
- Change Hostname or IP Address to IP address of the server hosting the Duo Authentication Proxy Service and Save
- From your existing NPS server, edit your existing connection (or add new) and replace the existing IP with the IP of your server hosting the Duo Authentication Proxy Service
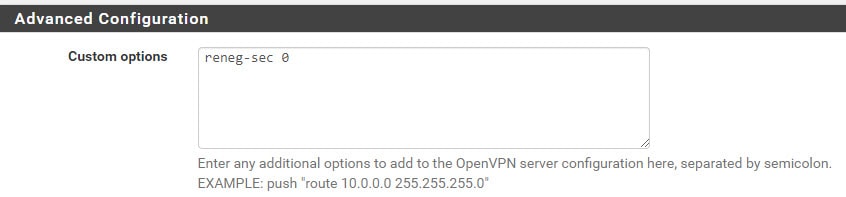
- Test your VPN – you should get a prompt when trying to connect – you can leave everything as-is from here, but when TLS attempts to renegotiate, it will cause numerous DUO prompts and you will be forced into reconnecting each hour. To circumvent this issue, type reneg-sec [numerical value of your choosing] under Advanced Configuration > Custom options in your OpenVPN Server Configuration. You can enter any value [in seconds] you wish to add here. To completely disable, enter value of 0. If you make this change, you will also want to make this change in your existing .ovpn configuration file on each client device. To do this, simply edit the file and add reneg-sec [same value from above] and save.
Known Issues
- This will break the ability for you to use the Diagnostics > Authentication option on the pfSense due to the time out being too short for the authentication to go through
- TLS Renegotiation will cause disconnects and multiple DUO prompts every 60 minutes unless you modify the custom options. You will need to add reneg-sec 0 (or whatever value you wish to renegotiate keys at) in both your users configuration files and your server custom options field
Troubleshooting
- If you can’t connect or are getting errors, check the log located at C:\Program Files (x86)\Duo Security Authentication Proxy\log
- You can use the above log to determine if additional attempts at authentication are happening that Duo isn’t logging on their site
- If a user is not getting a prompt
- Ensure they are setup and enrolled in Duo and have Duo installed on their phone
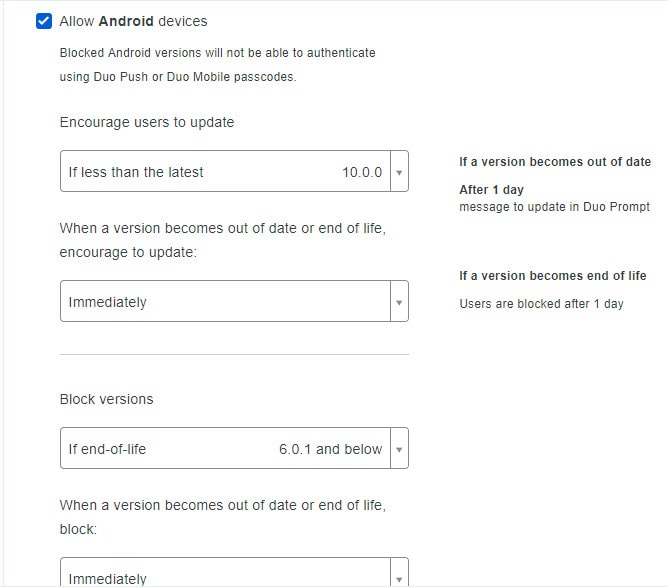
- Check Policy settings under Operating System and ensure Block versions is set far enough back that devices with outdated OS’s can connect